SStackora guideMenu ▾
Stackora guide
Write with AI
Connect one AI provider in WordPress 7 and let it write your page texts. You check every change before it goes live.
Stackora uses the AI built into WordPress 7. You connect one provider for the whole site, in Settings → Connectors, and Stackora, the page builder and other plugins use it. Nothing is sent anywhere until you click a button that asks the AI to write.
TestedEvery screenshot on this page was taken on WordPress 7.1.4 with the official OpenAI connector, Stackora 0.9.20 and Stackora Page Builder 0.13.5. Anthropic (Claude) and Google (Gemini) connect the same way.
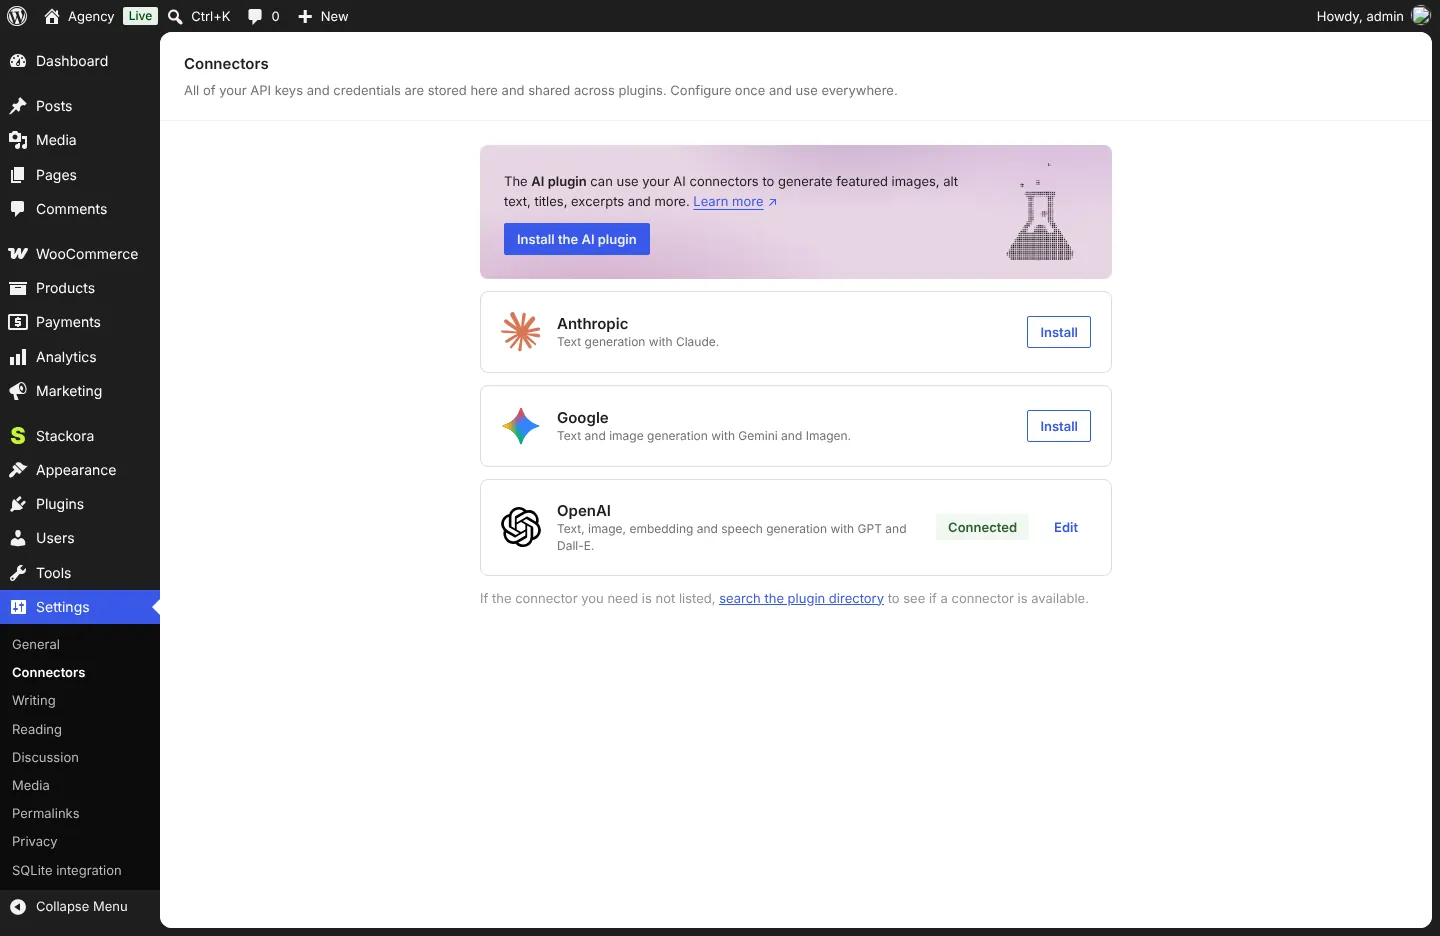
1. Connect a provider
- Open Settings → Connectors.
- Click Install next to Anthropic, Google or OpenAI, then paste your API key from that provider.
- The connector shows Connected. Usage is billed by the provider, to your account.
2. A tagline in the wizard
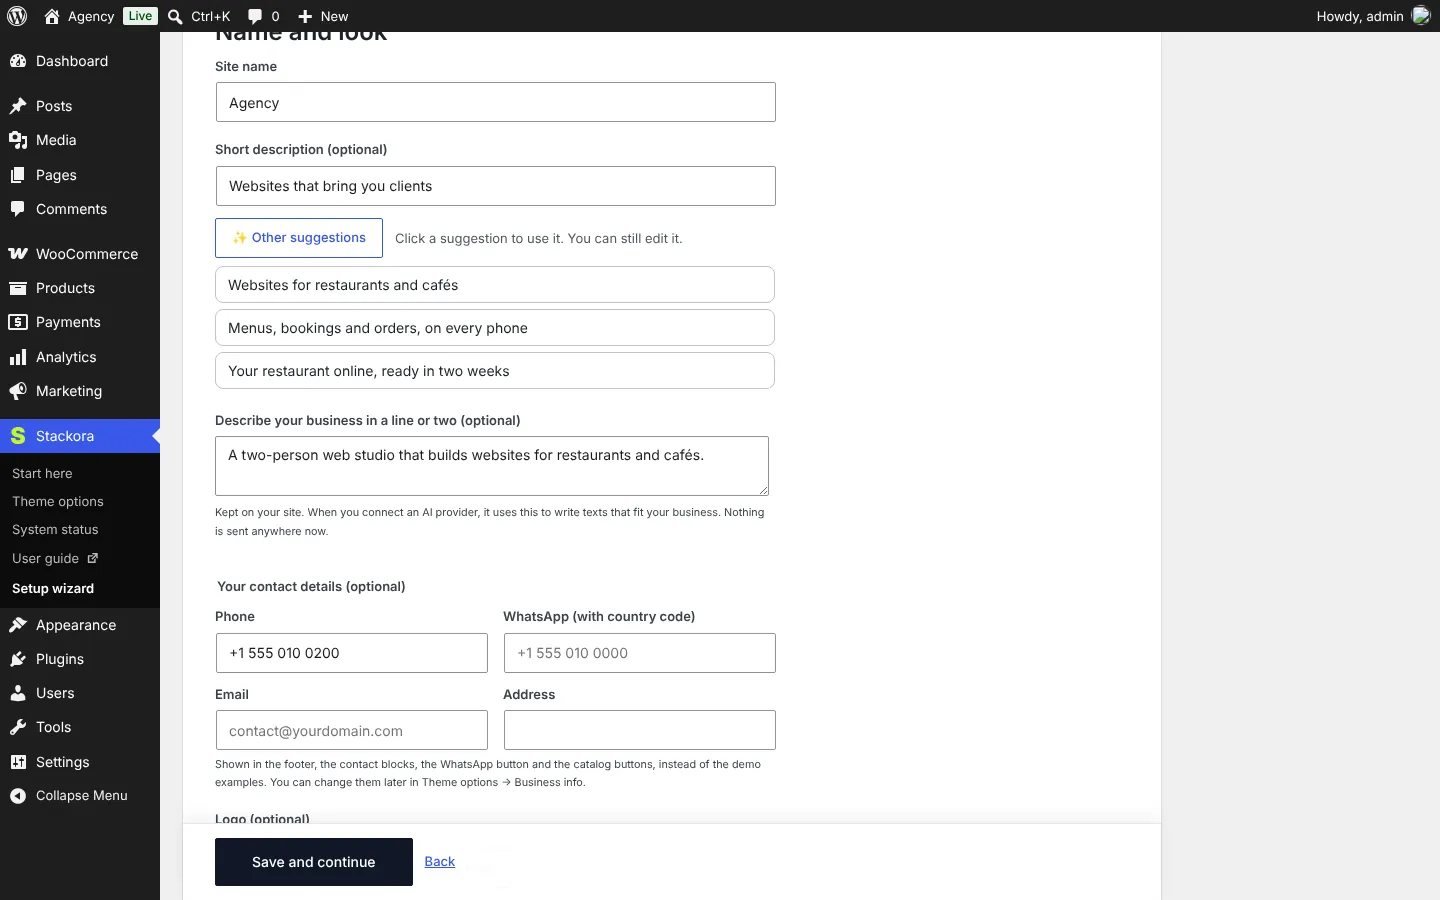
In Name and look, describe your business in a line, then click Suggest with AI. Click a suggestion to use it; you can still edit it.
3. All pages at once
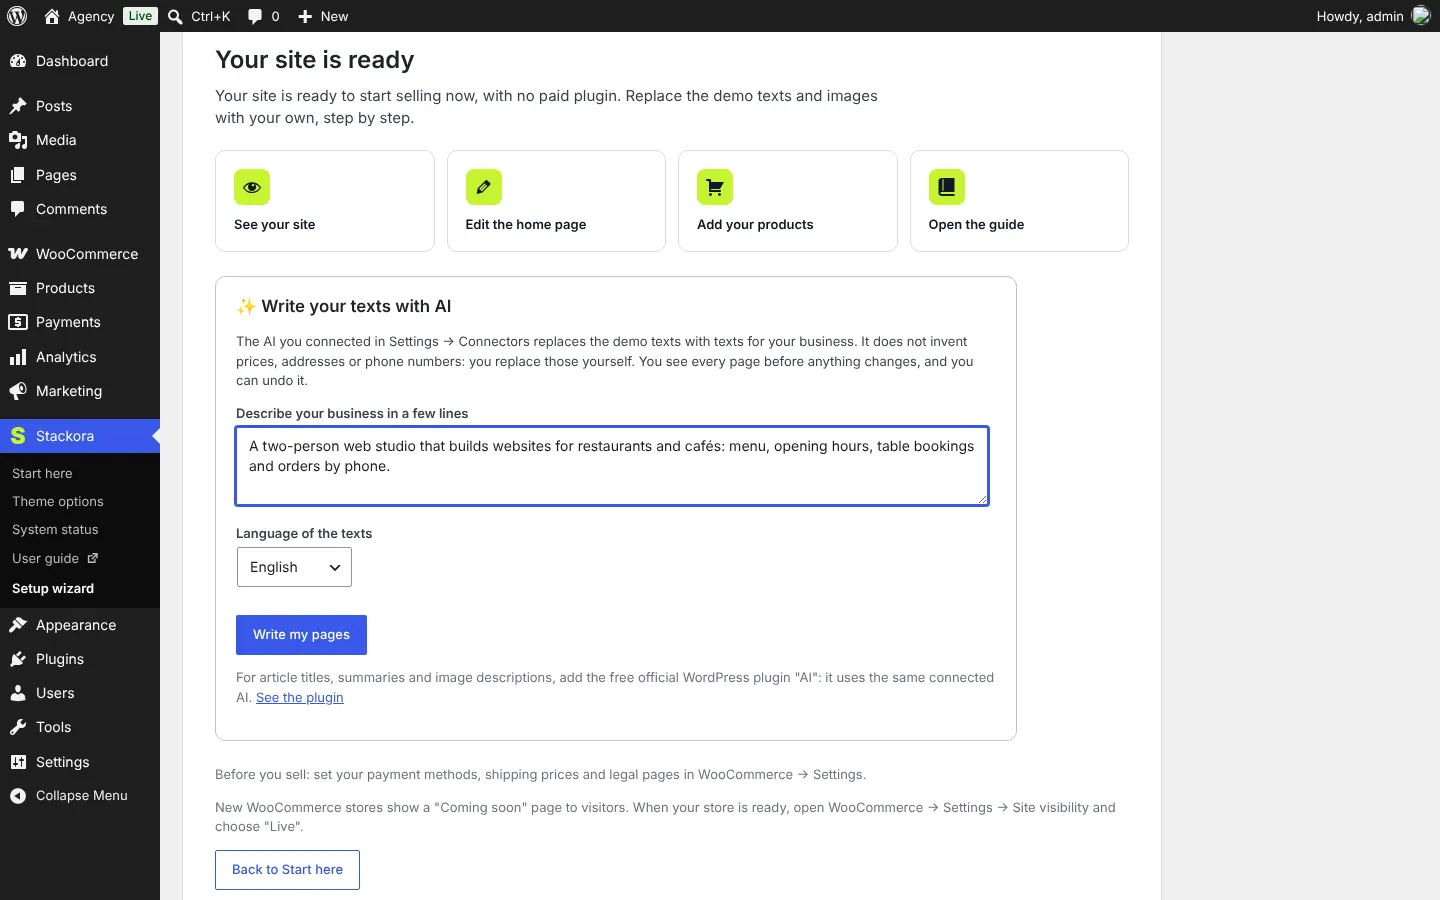
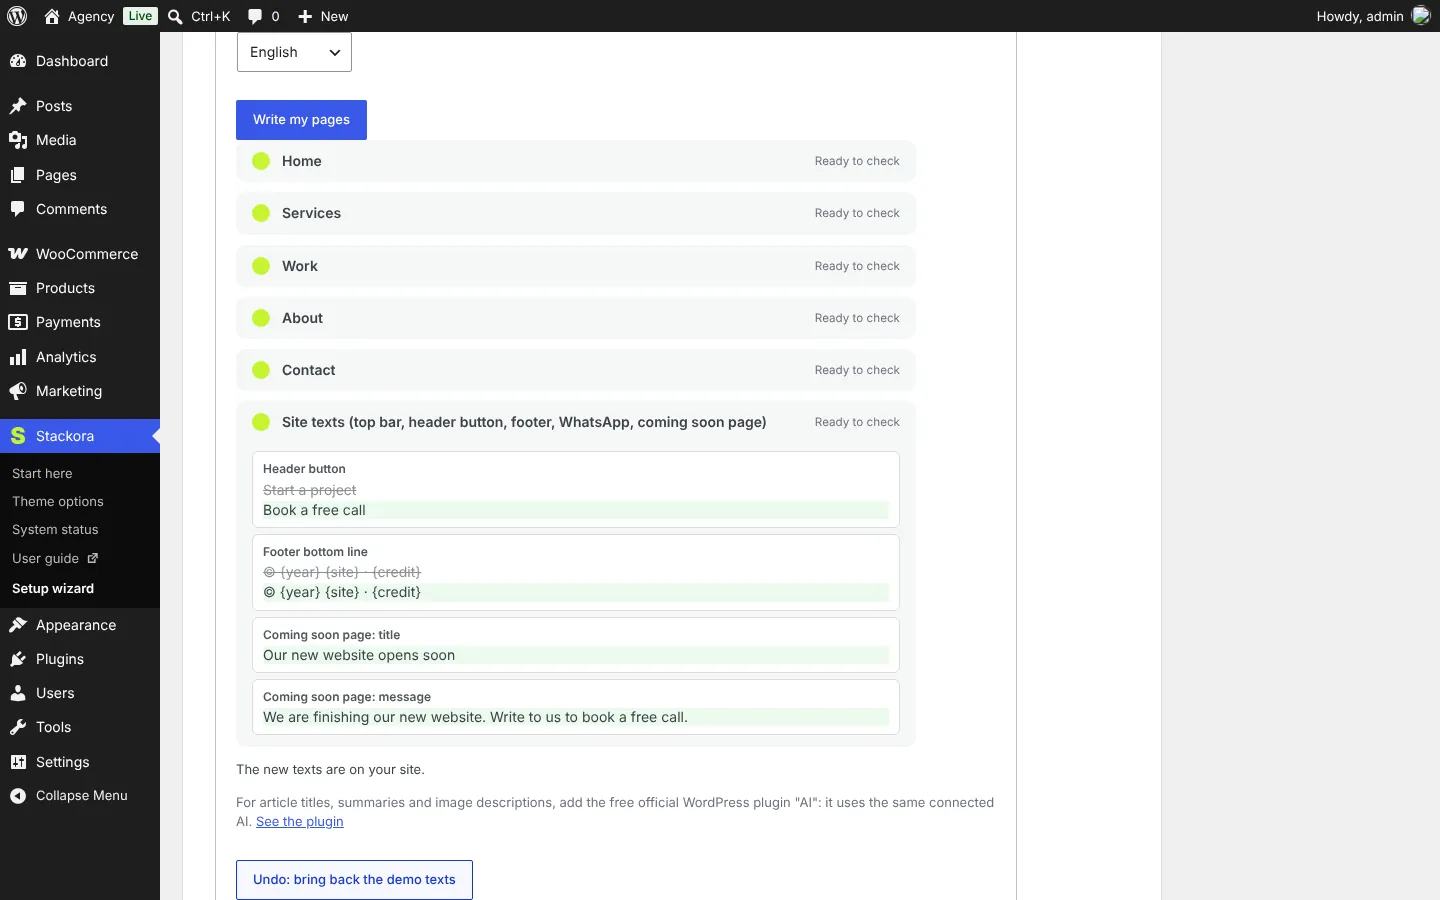
- Open Stackora → Setup wizard on the Ready step (or Start here → Write your texts with AI).
- Describe your business in a few lines and choose the language of the texts.
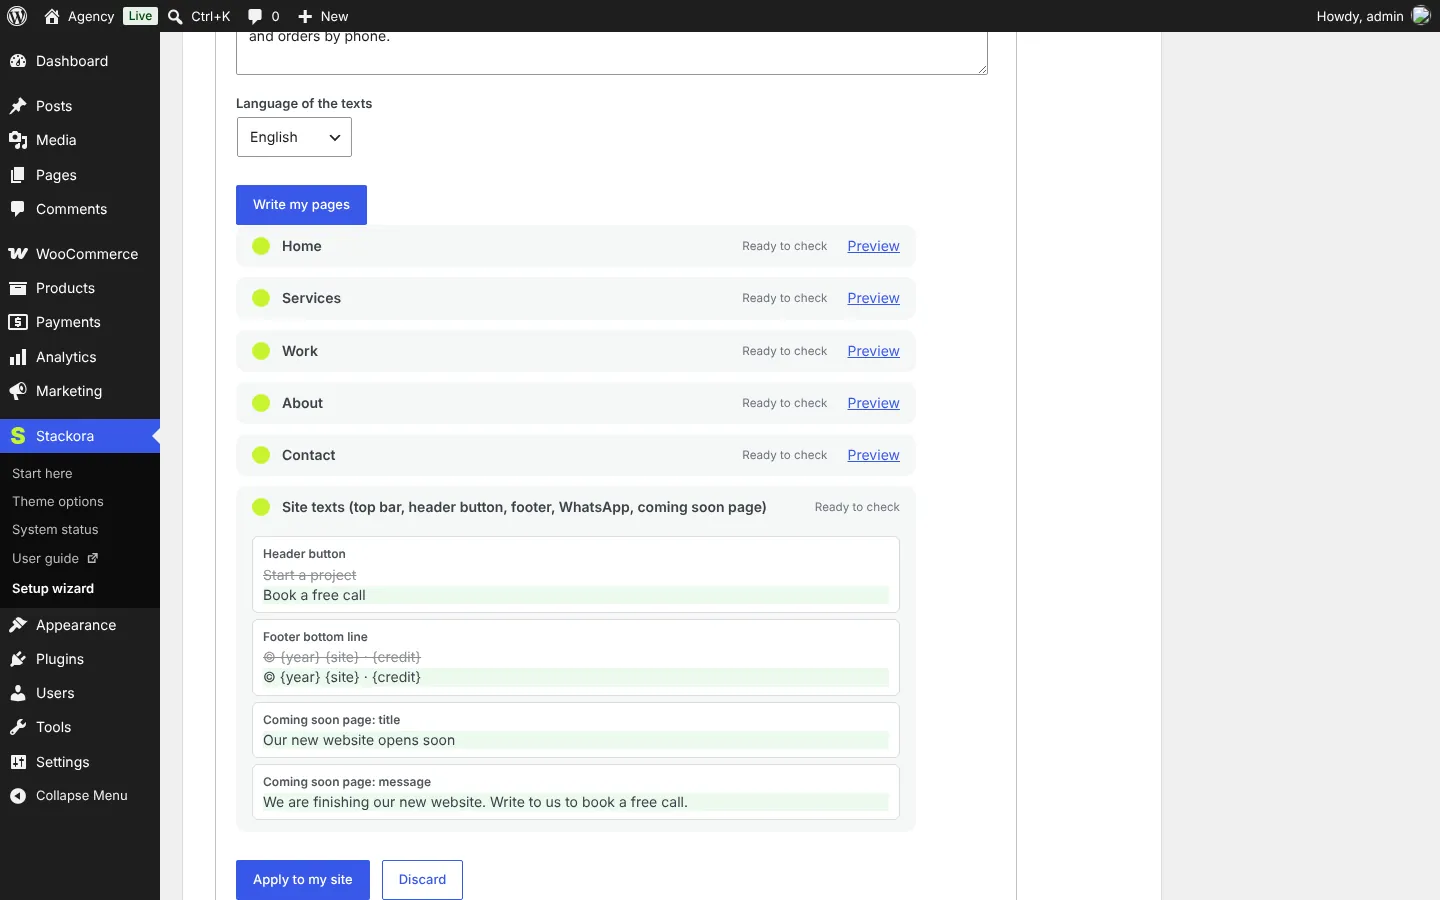
- Click Write my pages. Each page shows Ready to check with a Preview link.
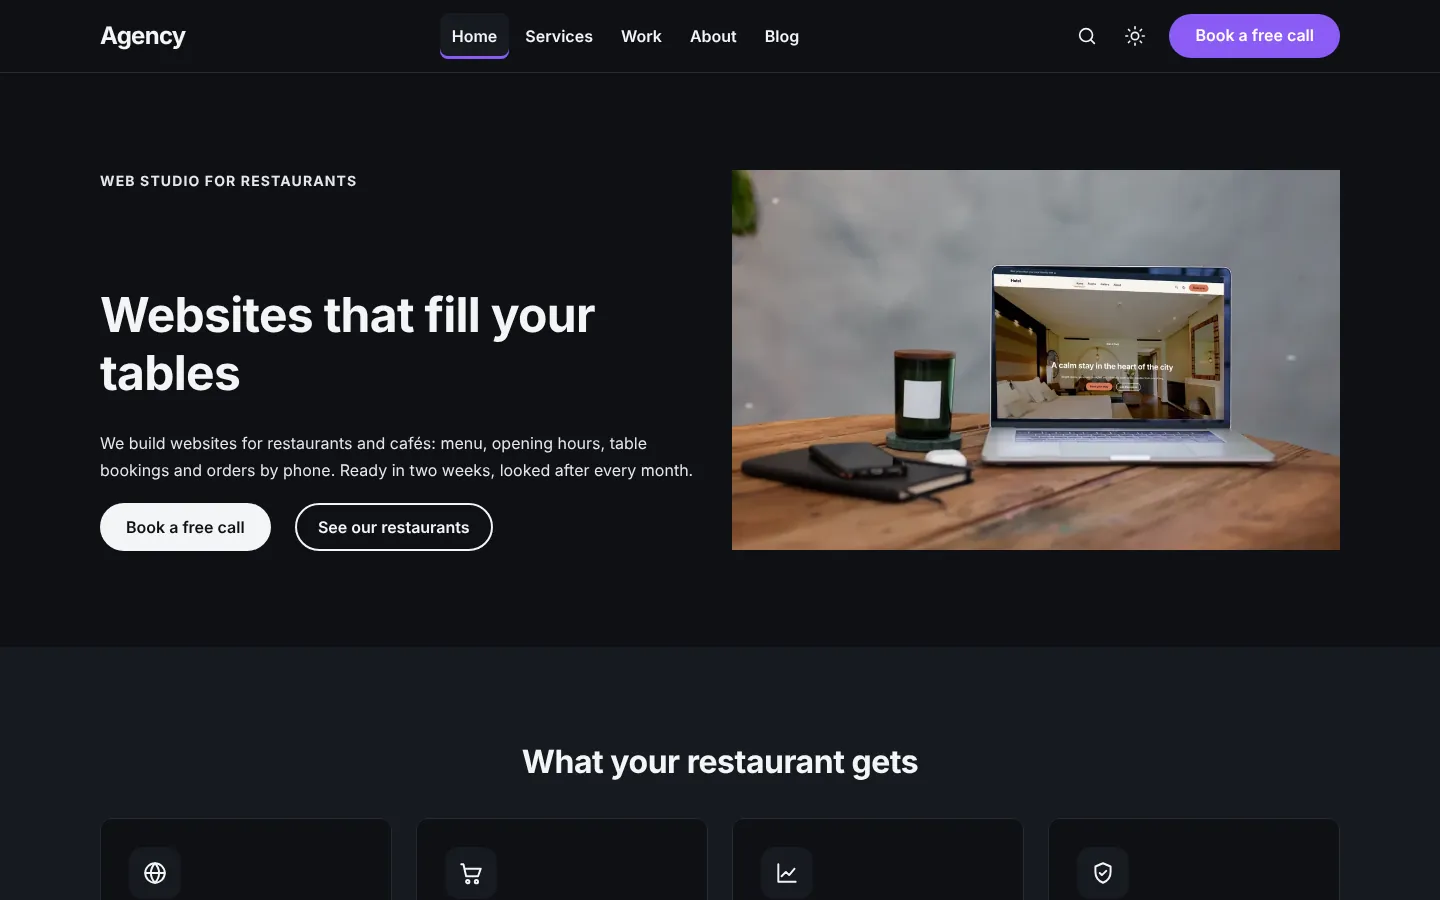
- Check the site texts (top bar, header button, footer, coming soon page): old text crossed out, new text below.
- Click Apply to my site. Changed your mind? Undo: bring back the demo texts.
4. One element at a time in the page builder
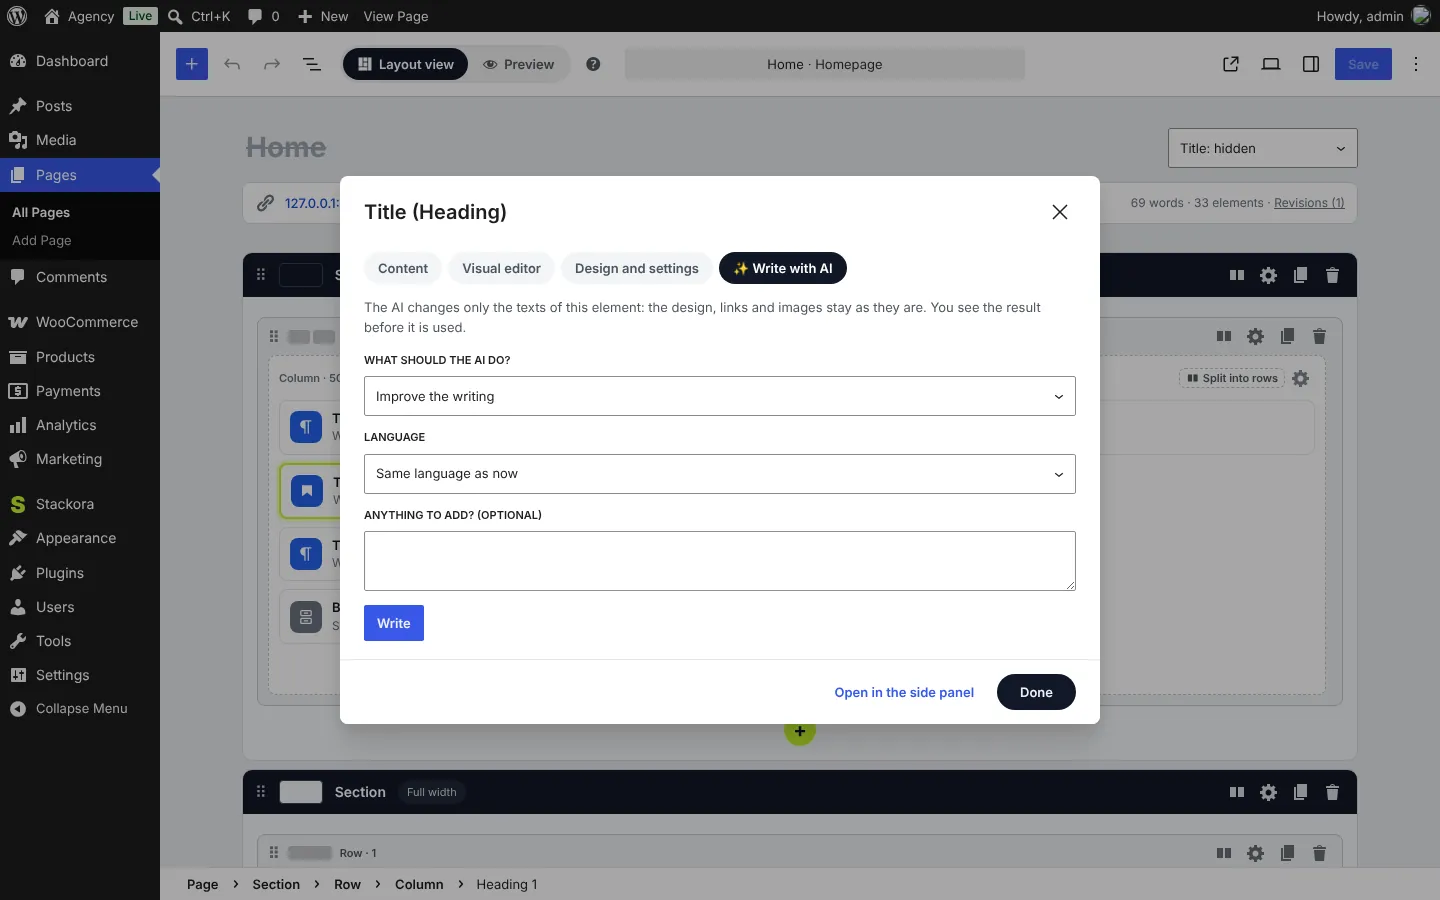
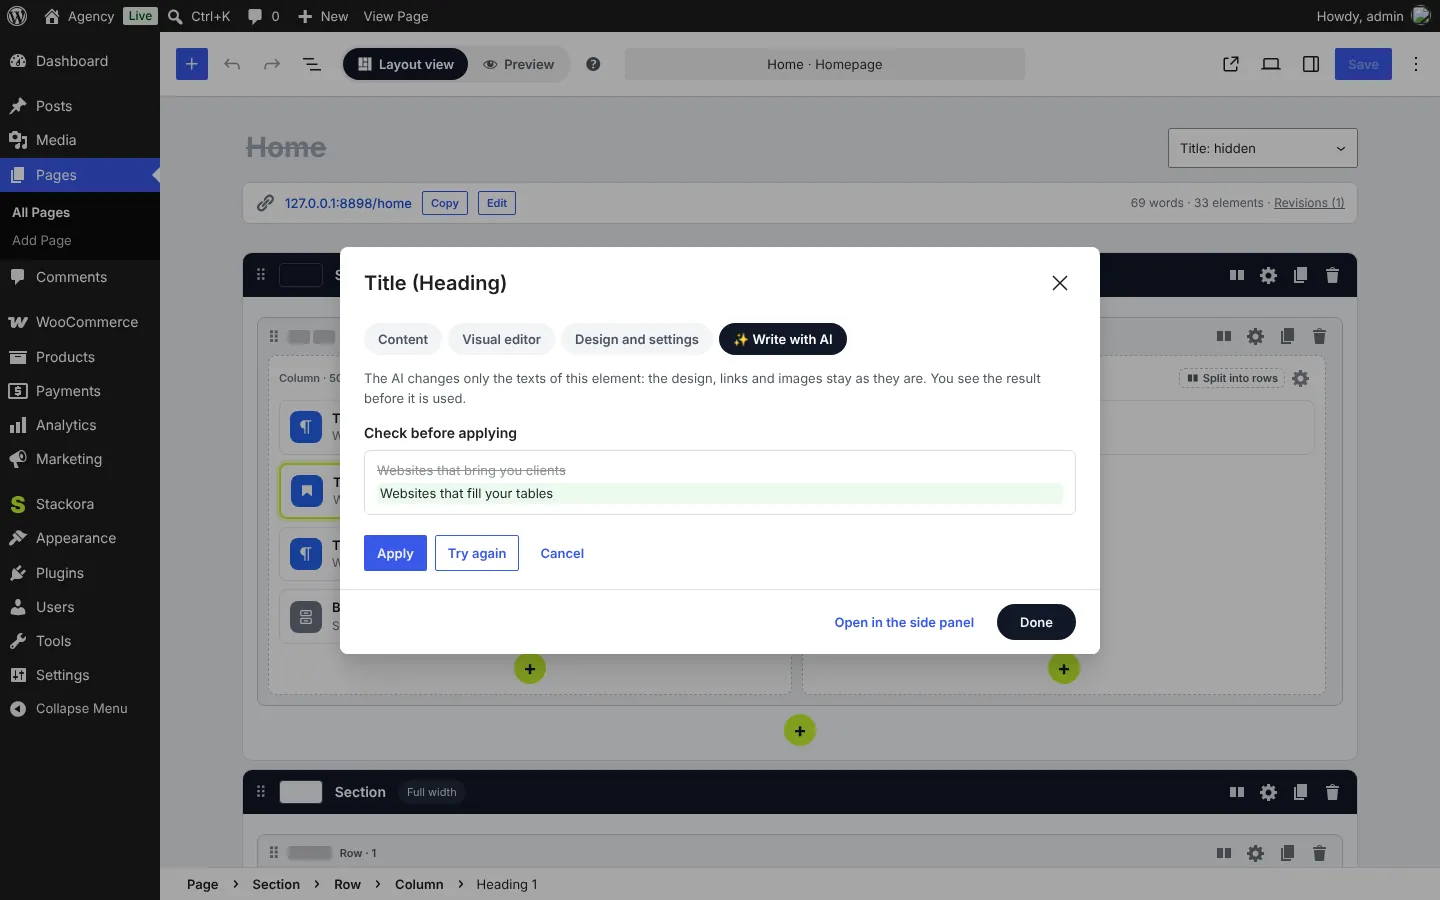
Click any element in Layout view and open the Write with AI tab. Choose what the AI should do: improve the writing, make it shorter, write new texts, translate, or write questions and answers. Then Write, check, and Apply.
Good to know
- The AI changes only texts a visitor reads. Design, links, images and settings stay exactly as they are; the builder checks the result before using it.
- Store texts (product and category descriptions) have their own Write with AI buttons in WooCommerce screens.
- For article titles, summaries and image descriptions, add the free official WordPress plugin AI. It uses the same connector.
- No AI connected, or WordPress older than 7.0? The AI buttons simply do not show. Everything else works.
Stackora by The Web Agency Stack · Screenshots taken on WordPress 7.1.4 with Stackora 0.9.20.